
Key facts: Repair vs replacement
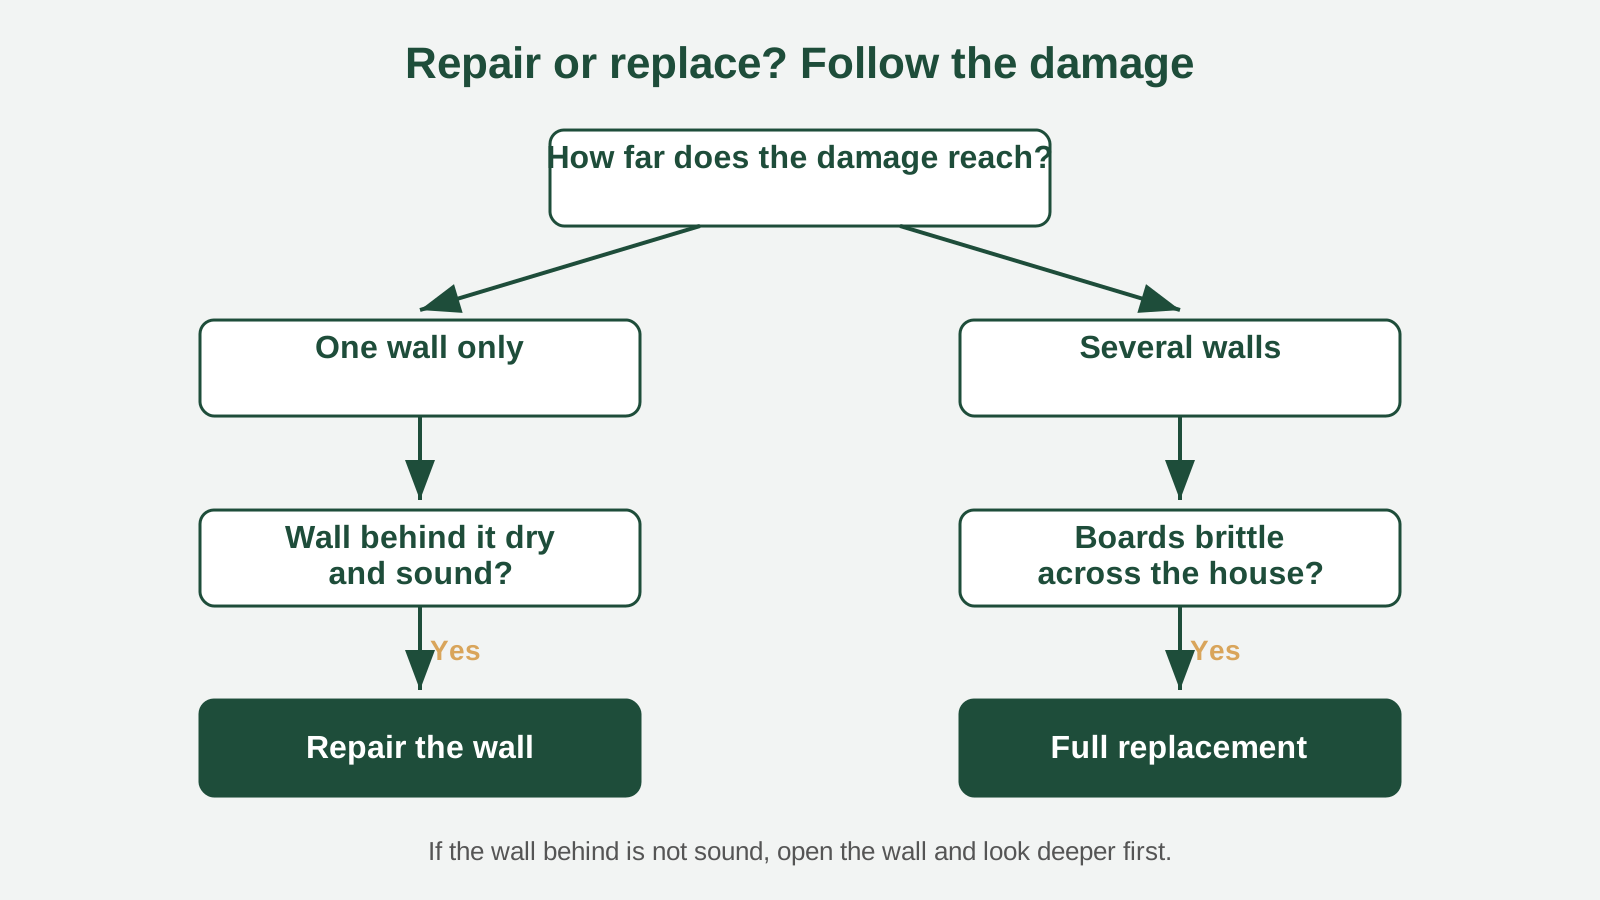
- A repair usually makes sense when damage is limited to one wall and the sheathing behind it is dry and sound. [1]
- Vinyl siding becomes brittle with age and cold, so matching old boards on an older Boston home can be difficult. [2]
- Boston's freeze-thaw winters and coastal storms can drive moisture behind siding, where damage spreads out of sight. [3]
The short answer
Repair or replace? Start with how far the damage reaches
For most Boston homes, the decision comes down to scope. When storm damage or a single failed board affects one wall and the structure behind it is dry, a focused repair restores that wall and leaves the rest of the house untouched. When damage shows up on several walls at once, when boards are brittle across the whole house, or when moisture has been working behind the siding for years, patching one spot after another stops making sense, and a full re-side becomes the steadier path. A siding contractor Boston homeowners call for an assessment will look past the surface, checking the sheathing, the flashing around windows, and the way water moves off the roof, because what is visible from the sidewalk rarely tells the whole story. That assessment is the moment the choice usually becomes clear, and it helps to let the inspection happen before settling on either direction.
Boston adds its own pressures to the decision. Triple-deckers in Dorchester, rowhouses in South Boston, and colonials in West Roxbury all face freeze-thaw winters that open small gaps a little wider each year, and coastal storms that push wind-driven rain into joints and seams. A repair that would hold for years on a sheltered wall can fail sooner on a windward elevation, so the side of the house matters as much as the damage itself. This guide gives you a way to judge each factor in turn, from the extent of the damage to the age of the material to how well new boards will match the old ones, so that when you call an independent local contractor, you can talk through the home with a clear picture of what you are deciding between. Keep the signs your siding needs replacing guide beside this one: it lists the warning signs that point toward replacement, while this guide focuses on how to weigh repair against replacement once you know what you are looking at.
At a glance
Repair vs replacement by situation
| What you are seeing | Repair is usually enough | Replacement is usually the sensible path |
|---|---|---|
| A few boards cracked by a storm on one wall | Yes, replace the damaged boards and check the flashing | No, the rest of the siding is still sound |
| Soft spots or staining on several walls | Rarely, the problem is likely behind the siding | Yes, open the walls and correct the water path |
| Siding is older and brittle across the house | Hard to do well, boards may crack during the work | Yes, new siding throughout gives a consistent result |
| Damage limited to one elevation, other walls sound | Often, or replace that one elevation for a clean result | Only if matching boards are no longer available |
| Same wall repaired more than once | Unlikely to hold, the cause may be behind the boards | Yes, a re-side lets the details be corrected |
| New boards cannot be matched to the old profile or tone | Only on a rear or side wall where a mismatch is less visible | Yes, especially on a street-facing elevation |
Follow the damage to the decision
First step
Judging how far the damage reaches
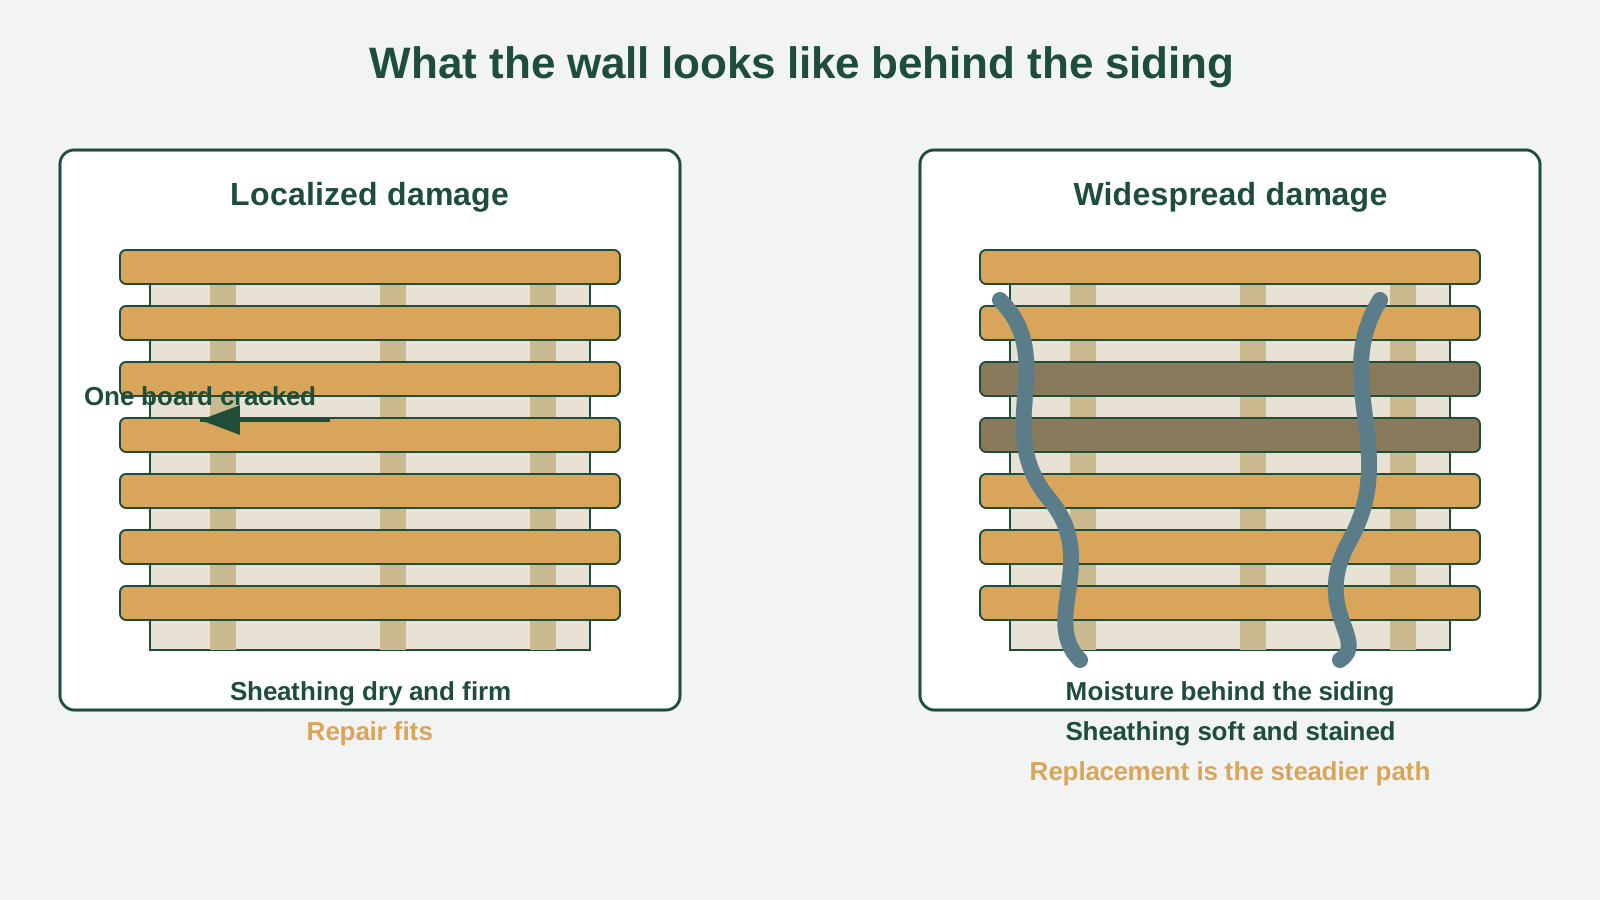
Start by mapping the damage the way a contractor would: wall by wall, course by course. Walk around the house and note which elevations show problems and which look untouched. A few cracked boards on the south-facing wall after a storm, with the rest of the house in good shape, point toward a repair. The same cracks spread across three elevations, or soft spots that appear on more than one wall, point the other way. Notice whether the damage sits on the surface or runs deeper: a board that is cracked but still firmly attached is a surface problem, while a board that flexes, pulls away from the wall, or shows dark staining at its lower edge may be telling you about moisture behind it. The moisture behind siding guide explains how water gets trapped and what it does once it is there. Take photographs of each wall before you call, so the contractor can see the pattern rather than a single close-up.
The pattern matters more than any single damaged board. Damage that follows a line, such as the course just above a porch roof or the boards below a leaking gutter, usually has a single cause that a repair can address along with the source of the water. Damage that appears in scattered places with no clear pattern is harder to explain with one cause, and it often means the siding as a whole has reached the end of its service life. Age plays into this too: boards installed decades ago tend to fail in several places at once, while newer siding usually fails at one weak point. When you map the damage, also check the corners, the trim around windows and doors, and the bottom course of each wall, because those are the places where water collects and where trouble shows up first.
Inside the house, the signs can be just as telling. Look at interior walls that back onto the damaged elevations for peeling paint, stains, or a musty smell near the base of the wall, especially after rain. These clues suggest water has been getting behind the siding for some time, and they change the scope of the decision even if the outside looks manageable. If you find interior signs, mention them during the assessment, because they help the contractor decide where to lift boards first. A wall that looks like a small repair from the outside but shows interior staining is a wall that deserves a closer look before any boards are replaced.
Age and material
How siding age and material change the answer
Siding age changes the answer because materials change as they get older. Vinyl siding, common on many Boston homes, grows brittle with years of sun and cold, and an older vinyl board can crack when it is handled during a repair, which turns a small patch into a larger area of work. Fiber cement holds its shape longer but can still suffer at cut edges and around fasteners if water has been reaching it for years, while wood clapboard on older homes may look weathered on the surface yet remain solid underneath, or it may hide rot at the lower courses where rain splashes back from the ground. Knowing what material you have and roughly when it was installed gives the contractor a starting point, and it tells you whether matching boards are still made in the same profile. The vinyl vs fiber cement guide compares the two most common materials in detail.
If the siding is relatively new and the damage is recent, repair is usually straightforward, because the same profile and color are still available and the boards around the repair are still flexible enough to work with. If the siding is twenty or thirty years old, the picture changes: the original profile may have been discontinued, the color may have faded unevenly across different elevations, and boards that look fine today may crack when they are lifted to fit a patch. In that situation a repair can still be done, but it may leave a visible seam or a patch that stands out from the street, and the next failure may not be far behind. That is the point at which many homeowners start to weigh a full re-side, not because one repair is impossible, but because the siding as a whole is moving toward the same condition.
Material also affects how a repair is carried out. Vinyl boards lock together along their edges and need room to expand and contract with temperature, so a repair on a cold day must allow for movement that a summer repair would not. Fiber cement boards are heavier and are cut and fastened differently, and the boards around a repair must be handled carefully to avoid chipping their edges. Wood clapboard can be patched board by board, but each new board must be primed on all sides, including the back, or it will take in moisture and fail early. These details are part of why the assessment matters: the right approach depends on the material as much as on the damage.
Surface damage is not the same as damage behind the wall
Matching and blending
Matching old profiles and color, and blending a partial replacement
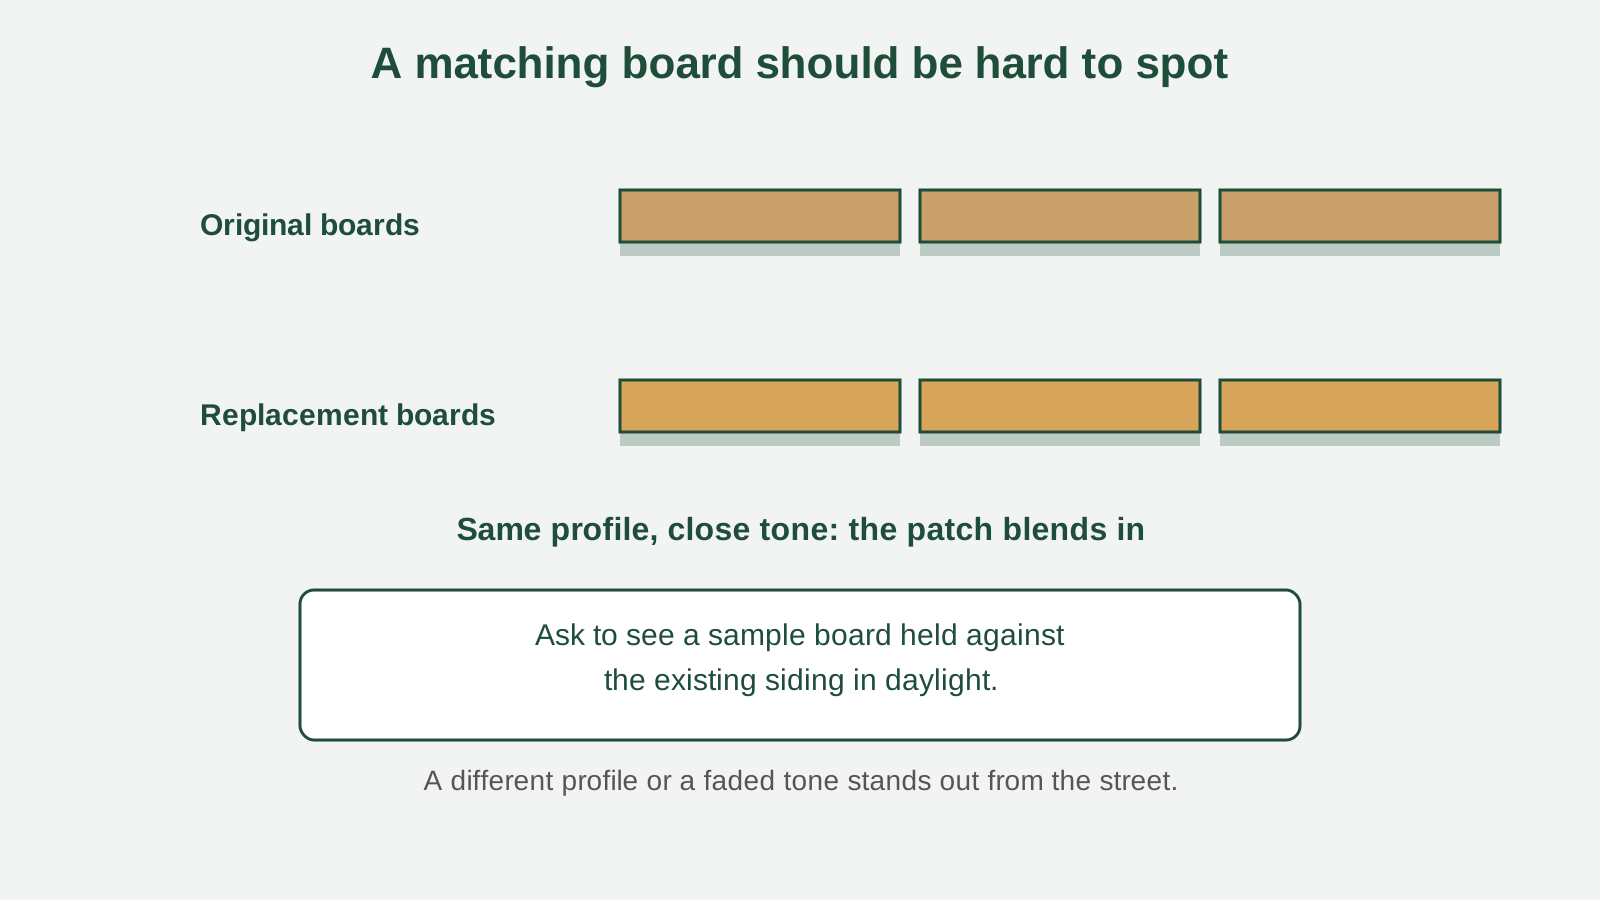
Matching is where many repair decisions are won or lost. Siding profiles, the shape and exposure of each board, change over the years as manufacturers update their lines, and a board made today may not sit flush with a board made fifteen years ago. Even when the profile matches, color is a separate problem: siding fades in the sun, and a wall that faces south will have faded more than a wall that faces north, so a brand-new board in the original color can look noticeably different next to its older neighbors. A contractor can sometimes source a close match, or blend a repair across several courses so the change in tone is less obvious, but on a prominent front elevation a mismatch can be visible from the sidewalk. Ask to see a sample board held against the existing siding in daylight before agreeing to a patch on a street-facing wall.
There are ways to make a partial replacement blend better. Replacing a full course from corner to corner, rather than a short section in the middle of a wall, hides the joint at the trim where the eye expects a break. Working from a natural stopping point, such as a window, a corner board, or a change in the wall plane, also helps the new work read as intentional rather than patched. On the rear or a side wall that few people see, a close match is usually good enough, and most homeowners accept a small difference there. On the front of a rowhouse in South Boston or a triple-decker in Dorchester, where the whole facade is on display, the standard is higher, and a mismatch that would pass unnoticed at the back can become the first thing a visitor sees. That difference in visibility is a fair part of the decision.
Partial replacement sits between a small repair and a full re-side: one wall, or one elevation, is replaced while the rest of the house keeps its existing siding. This approach fits when the damage is concentrated on a single side, often the windward wall that takes the brunt of coastal storms, or the wall below a roof valley where water has been running for years. Replacing a whole elevation gives a clean result on that wall, with consistent color and profile from top to bottom, and it avoids the patchwork look of boards spliced into the middle of a wall. It also lets the contractor open up that one wall, check the sheathing behind it, and correct any flashing or water-management problem that caused the damage in the first place. The trade-off is that the new elevation will look newer than the rest of the house, especially in the first year, until sun and weather begin to even out the tone.
Blending new work with old work takes planning. If the rest of the house is faded, a new wall in the original color will stand out until it weathers, and on some materials that weathering can take a season or more. A contractor may suggest replacing to a natural break, such as a corner or a trim line, so the change in tone has a clear edge rather than a ragged line across a wall. In some cases the better move is to replace two adjoining elevations rather than one, so the new work wraps a corner and looks deliberate from the street. Talk through these options during the assessment, and ask how the new boards will be tied into the old ones at the corners, because a neat transition there is what makes a partial replacement look finished rather than half done.
When repair fits
When a repair is enough
A repair is enough when the problem is isolated and the wall behind it is sound. A few boards cracked by a fallen branch, a section loosened by a windstorm, or damage limited to the boards around a single window are all cases where siding repair restores the wall without touching the rest of the house. The key checks are simple: the sheathing behind the damaged boards should be dry and firm, the surrounding boards should still be flexible and firmly fastened, and the cause of the damage should be something you can point to and correct, such as a gutter that overflowed or a branch that struck the wall. When those checks pass, a repair is not a compromise; it is the right scope for the problem, and it leaves the rest of the siding to keep serving for years.
Repair also fits when the siding is still within its useful life and the profile and color are still available. If the house was sided within the last decade and the damage came from a single event, the new boards will match, the surrounding boards will accept the work without cracking, and the finished wall will look consistent. The siding after hail or wind damage guide covers what to do in the days right after a storm, including how to document the damage and protect the wall while you arrange a repair. One caution: a repair that is done well still needs the cause addressed. If a gutter keeps spilling water onto the same boards, or a piece of flashing keeps letting water in behind the siding, the same wall will need attention again, and at that point the conversation changes.
A repair visit usually follows a predictable pattern, and knowing it helps you judge the work as it happens. The contractor removes the damaged boards and the boards around them that must be lifted to fit the replacements, then inspects the sheathing and flashing that are exposed. Any soft sheathing is cut out and replaced, and any flashing that failed is corrected before the new boards go on. The replacement boards are fitted so their joints fall at trim or at a natural break in the wall, and the courses are checked for level as they go up, because a board that starts out of level will show across the whole wall. Before the crew leaves, the wall should be checked from the street as well as from close up: a repair that looks neat from three feet away but stands out from the sidewalk has not really blended. If the repair involves a prominent elevation, ask to walk the result with the contractor before they pack up, so any board that sits proud or any tone that clashes can be dealt with while the tools are still out. A written note of what was found behind the boards, and what was corrected, is also useful to keep with the home's records for the next time the siding is assessed.
Every Boston house type has its own trouble spots
Siding installation Boston
When replacement is the sensible path
Replacement becomes the sensible path when the problems are widespread rather than isolated. Boards that are brittle across the whole house, rot that shows up on more than one elevation, or moisture stains that keep returning after repairs all point the same way: the siding system as a whole has reached the end of its useful life. Stacked layers are another clear signal. Some older Boston homes carry a layer of newer siding over an older layer, and once the outer layer starts to fail, the layers underneath are usually in worse shape, holding moisture against the sheathing. In that situation, taking everything back to the sheathing is the only way to see what is really going on, and a full siding installation gives the house a clean start with proper flashing, house wrap, and water management throughout.
Recurring moisture is the strongest argument for replacement. If you have had the same wall repaired more than once, or if new soft spots keep appearing near windows, at the base of walls, or below rooflines, the problem is probably not the boards themselves but the way water is moving behind them. A re-side lets a contractor correct the details that repairs cannot reach: flashing that was never installed properly, gaps where different materials meet, and ventilation that traps damp air against the sheathing. It also lets the house be brought up to current practice in one pass, rather than in a series of patches spread over several years. That is the point at which a siding installation Boston homeowners plan as a single project becomes the steadier choice, even though it involves more work up front than another patch.
Siding contractor Boston
What a contractor checks during an assessment
- 1
Walk the whole house first
The contractor walks every elevation, not just the wall you called about, noting which walls show damage and which look sound, so the pattern is clear before any boards are lifted.
- 2
Press and probe the boards
Boards are pressed and gently probed at the lower courses, around windows, and near rooflines, where moisture collects, to find soft spots that are not visible from the ground.
- 3
Lift a few boards in the worst areas
In the areas that look worst, a few boards are lifted so the sheathing and flashing behind them can be seen, which is where the real condition of the wall becomes clear.
- 4
Check flashing, gutters, and rooflines
The contractor looks at how water moves off the roof and around windows and doors, because a repair that ignores a flashing or gutter problem will not last.
- 5
Identify the material and its age
The siding material is identified and its age is discussed, which determines whether matching boards are still made and whether the surrounding boards can be worked without cracking.
- 6
Talk through repair and replacement side by side
Finally, the contractor talks through both options for your home, explaining what each would involve on your walls, so you can decide with the full picture in front of you.
Behind the boards
What is found once boards come off, and mistakes that turn a repair into a bigger job
One reason the decision can feel uncertain is that the full picture only appears once boards come off. From the outside, a wall can look like it needs a small patch, while the sheathing behind it is soft, darkened, or crumbling from years of slow moisture. A contractor who opens a wall during an assessment, or during the first stage of a repair, may find that the damage runs further than the visible boards suggested, sometimes along the bottom course where water has collected, or around a window where flashing failed long ago. This is normal, and it is why a good assessment includes a plan for what happens if the wall behind the siding needs attention too. Ask the contractor what they will do if they find soft sheathing, and how they will keep you informed as the work opens up.
What is found behind the siding can change the decision on the spot. A small area of soft sheathing can be cut out and replaced as part of a repair, and the job continues as planned. Widespread softness, framing that shows signs of long-term moisture, or insulation that is wet through means the wall needs more than new boards, and the repair that seemed straightforward becomes a larger job. This is not a reason to avoid opening a wall; it is a reason to open it before committing to a plan, so the decision is based on what is actually there rather than on a guess from the sidewalk. A thorough assessment, including a look behind a few boards in the worst areas, is the most reliable way to choose between repair and replacement with confidence.
A few common mistakes can turn a manageable repair into a bigger job. The first is covering damaged boards with new siding instead of removing them, which traps moisture between the layers and hides rot that keeps spreading out of sight. The second is patching the boards without fixing the water source, such as a failed flashing or a gutter that spills onto the wall, so the new boards fail in the same place. The third is using a profile or fastener that does not suit the existing siding, which can leave gaps that let wind-driven rain in behind the patch. Each of these is avoidable, and each is a reason to have the assessment done by someone who will open the wall and look, rather than someone who only works from the sidewalk.
Another mistake is waiting too long after damage appears. A cracked board is a small problem while the sheathing behind it stays dry, but once water starts getting in, the sheathing softens, the framing can be affected, and a repair that would have involved a few boards becomes a wall rebuild. Boston winters make waiting riskier, because freeze-thaw cycles widen small openings and wind-driven rain finds every gap. If you are unsure whether a repair can wait until spring, ask an independent local contractor to look at the wall and advise on whether it needs temporary protection. Before any work begins, it also helps to understand the local rules: the Boston siding permits guide explains when a permit is needed, and the hiring a siding contractor in Boston guide explains what to ask before agreeing to a job.
Boston homes
How the answer differs for triple-deckers, rowhouses, and colonials
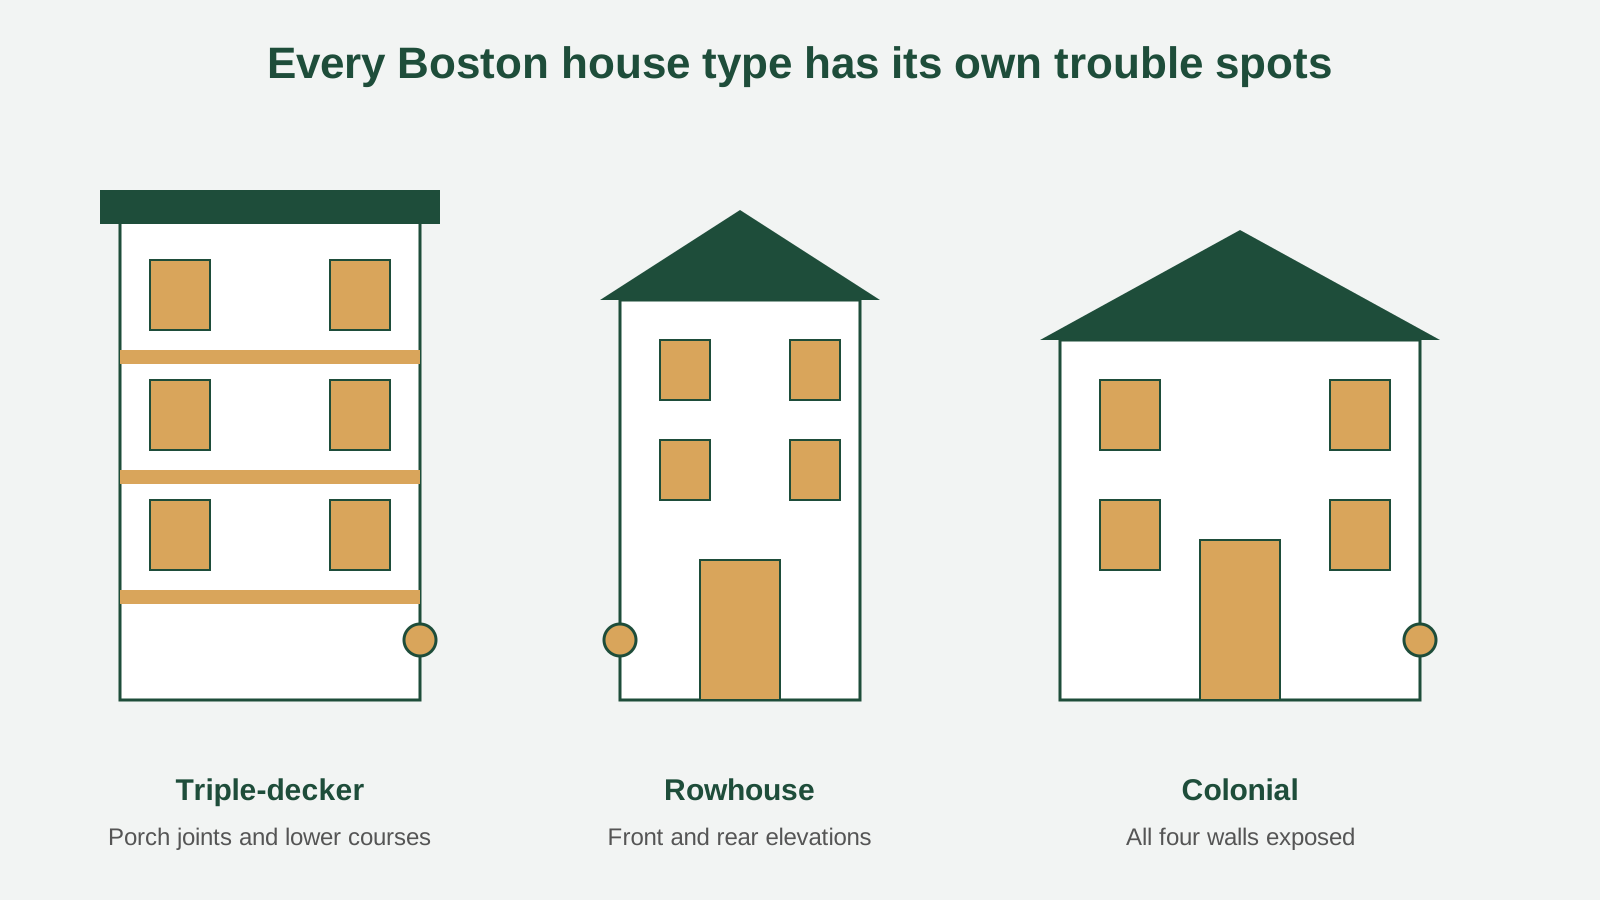
Boston house types change the answer because they are built differently and they weather differently. Triple-deckers, common in Dorchester and Jamaica Plain, have three stacked flats with deep porches and long side walls, and their siding often fails first at the porch joints and along the lower courses where rain splashes back from narrow side yards. Rowhouses in South Boston and Charlestown share walls with their neighbors, so only the front and rear elevations are exposed, which concentrates weather on two faces and can make a partial replacement of one elevation a practical option. Colonials in West Roxbury and East Boston stand on their own lots with all four walls exposed, so damage tends to spread more evenly and a repair on one wall may soon be followed by work on another.
The age of the house matters too. Many Boston homes were built before modern house wrap and flashing details became standard, so water that gets behind the siding has fewer ways out, and damage can spread further before it shows on the surface. On a triple-decker, the stacked porches create horizontal surfaces where water sits, and the siding just above and below those porches deserves a close look during any assessment. On a rowhouse, the rear elevation often faces a narrow yard or alley where sun rarely reaches, so boards there stay damp longer after rain and can deteriorate while the sunny front still looks sound. Knowing how your house type behaves helps you read the damage in context, and it helps the contractor explain why a repair that fits one house may not fit another on the same street.
Your decision checklist
A checklist for deciding between repair and replacement
- Map the damage wall by wall before you call, and note which elevations are affected.
- Check whether the sheathing behind the damaged boards is dry and firm.
- Ask whether the siding profile and color are still available for a match.
- Consider how visible the repair will be from the street, especially on the front elevation.
- Look for repeat problems on the same wall, which suggest the cause sits behind the siding.
- Ask what the contractor will do if soft sheathing is found once boards come off.
- Read the signs guide alongside this one to confirm which warning signs apply to your home.
- Confirm whether a permit is needed before work begins.
A matching board should be hard to spot
Common questions
Questions Boston homeowners ask about repair vs replacement
How do I know if my siding can be repaired instead of replaced?
Repair usually fits when the damage is limited to one wall, the sheathing behind it is dry and firm, and matching boards are still available. If damage appears on several walls, or the boards are brittle across the house, replacement is usually the steadier path. A contractor assessment, including a look behind a few boards, gives the clearest answer.
Can you replace just one wall of siding?
Yes. Replacing a single elevation is a common middle path when damage is concentrated on one side, often the windward wall. The new wall will look newer than the rest at first, and replacing to a natural break such as a corner or trim line helps the change in tone look deliberate rather than patched.
Will a repair match the rest of my siding?
It depends on the age and profile of your siding. Newer siding usually matches well because the same profile and color are still made. Older siding may have faded unevenly or been discontinued, so a patch can stand out, especially on a street-facing wall. Ask to see a sample board held against the existing siding in daylight.
What does a siding contractor check during an assessment?
A contractor walks every elevation, probes boards at lower courses and around windows, lifts a few boards in the worst areas to inspect the sheathing, and checks flashing, gutters, and rooflines. They also identify the material and its age, then talk through repair and replacement side by side for your home.
How long can I wait to repair damaged siding?
It depends on whether water can reach the sheathing. A cracked board that leaves the wall open to rain should not wait through a Boston winter, because freeze-thaw cycles widen small openings and wind-driven rain finds every gap. Ask a contractor whether the wall needs temporary protection while you decide.
Is it a problem if my house has more than one layer of siding?
It can be. Older Boston homes sometimes carry a newer layer over an older one, and moisture trapped between layers can hide rot. Once the outer layer starts to fail, the layers beneath are often in worse shape, which is a strong reason to consider taking everything back to the sheathing.
Why does my siding keep failing on the same wall?
Repeat failure on one wall usually means the cause sits behind the boards, such as flashing that lets water in, a gutter that spills onto the wall, or a detail where two materials meet. Patching the boards without correcting the cause will not hold, and a re-side lets those details be fixed properly.
Does a triple-decker need different siding work than a colonial?
The approach is similar, but the trouble spots differ. Triple-deckers often fail first at porch joints and lower courses, rowhouses concentrate weather on the front and rear elevations, and colonials expose all four walls. A contractor familiar with Boston house types will know where to look first on your home.
What happens if rot is found once the boards come off?
A small area of soft sheathing can be cut out and replaced as part of the job, and the work continues as planned. Widespread softness or wet insulation means the wall needs more than new boards. That is why a good assessment includes a look behind a few boards before you commit to a plan.
Do I need a permit to repair or replace siding in Boston?
Permit requirements depend on the scope of the work and the property. Repairs of a few boards are often treated differently from a full re-side. The Boston siding permits guide on this site explains when a permit is needed and what the process involves.
Should I repair siding after a storm or wait and see?
Act promptly after a storm, because an opening in the siding lets the next rain reach the sheathing. Document the damage with photographs, protect the wall if boards are missing or torn, and arrange an assessment. The storm-damage guide on this site covers the first steps in detail.
How do I choose between a repair and a full re-side?
Work through the checklist in this guide: map the damage, check the sheathing, confirm matching boards are available, and consider how visible a patch will be. If the damage is isolated and the wall behind it is sound, repair. If it is widespread, recurring, or the siding is brittle throughout, a full re-side is usually the steadier choice.